
Grow Guide for XL MonoBox™ Grow Kit version 2.1
We also recommend reading our troubleshooting guide before attempting any grow as it’s full of useful information which will help you solve and avoid problems.
Step 1: Inoculation of Sterile Grain Spawn
To minimize the risk of contamination, it’s best to work in a small, clean, and draft-free room within a Still-Air Box. Before starting, make sure you shower and put on fresh clothes, and clean your hands and forearms with a blue Clinell wipe. Remember to fit your face mask, but leave your sterile gloves for step 4.
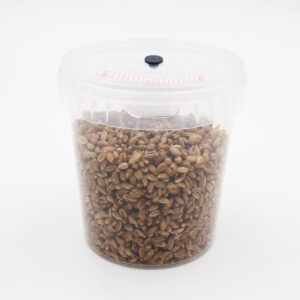
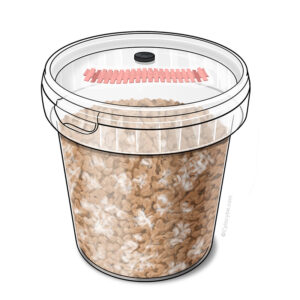
Prepare your chosen syringe by screwing on a new sterile needle. Take your SpawnTub from the box. It is now more exposed to the open air and potential contaminants, which is why we highly recommend working within a SAB to greatly reduce your chances of contamination.
Use a green Clinell alcohol wipe to clean the grey rubber injection port on the lid of the SpawnTub, rattle your syringe off a surface (not too hard or you will break it) to dislodge stuck spores and then pierce through to inject between 1.5-2ml of solution into the port. Remember to never inject through the pink filter!
When you pierce your needle through, aim it towards the edge of the SpawnTub and inject the full 1.5-2ml of solution in that spot. This will allow the spore solution to work its way down through the grain, and the mycelium growth will be easier to observe as it begins on the visible edge of the SpawnTub rather than hiding in the centre of the grain where it’s harder to see.
Step 2: Colonisation of Sterile Grain Spawn
Once you’ve injected the spore solution into the SpawnTub, it’s time to start the colonisation process. Mycelium is a living organism that needs to breathe, so don’t store your SpawnTub in an airtight container. Instead, use the cardboard box it arrived in to store your colonising SpawnTub to keep it clean.
 Temperature is crucial for achieving good colonisation. Too much heat (above 26°C) or cold (below 20°C) will likely result in colonisation issues like contamination or slow-to-no growth. Keep the temperature between 20-26°C, and try to maintain a consistent temperature. Avoid using heat mats, which may create excessive condensation and provide an easy pathway for contamination to enter your SpawnTub.
If you’re struggling to maintain these temperatures, consider building or buying an incubator. This is much cheaper than keeping your home heating on all the time and provides much better results.
Under optimum conditions at 26°C, it will generally take around 2-3 weeks for your SpawnTub to fully colonise. However, this timeline depends on various factors, and nature can be unpredictable.
Step 3: Preparation of XL MonoBox™
Once the grain within your SpawnTub is fully colonised, meaning it’s completely covered in healthy, white mycelium, it’s time to move on. Don’t open your SpawnTub before full colonisation, as exposing uncolonised grains to the open air hugely risks contamination.
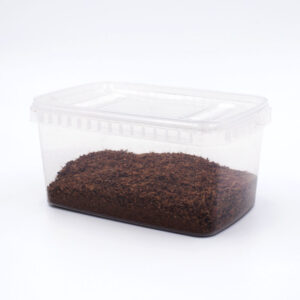 To sanitise and prepare your XL MonoBox™, remove the lid and pour 450ml of tap water into the coir. Click down 3 corners of the lid, leaving 1 loose to allow for ventilation, and microwave on high for 10 minutes. Make sure your microwave is clean for this! If you don’t have a microwave, please refer to the MonoBox product page on our website for alternative instructions.
When the XL MonoBox™ is ready, remove it from the microwave and let it cool down to room temperature. Be careful when handling it from the microwave, as it will be as hot as the sun something which has been microwaved for 10 minutes.
Let XL MonoBox™ cool to room temperature.
No Microwave?
If you don’t have a microwave, no problem! You can use steam sterilisation with a pot of water. Here’s how:
- Get your pot ready: Put a few inches of water in a big pot. You’re going to put the MonoBox in the pot, but it shouldn’t touch the water, so you’ll need to lift it up a bit.
- Make a stand: Roll up some balls of tinfoil that are big enough to hold up the MonoBox above the water in the pot.
- Wet the coir: Pour boiling water onto the coir in your MonoBox. The instructions will tell you how much water to use. Stir it all around to get it wet everywhere.
- Get your MonoBox ready for sterilising: Put the lid on the MonoBox, but leave one corner open so some air can get in. Put some loose tinfoil around the top of the MonoBox and then put it in the pot you prepared.
- Sterilise: Keep the water in the pot boiling gently for about 30 minutes. Check to make sure the water doesn’t all boil away – if it looks low, add more boiling water from your kettle.
- Cool down: After 30 minutes, take the MonoBox out of the pot (be careful, it will be hot!) and leave it to cool down until it’s room temperature.
When your MonoBox is cool, you’re ready to go on with the rest of the instructions.
Step 4: Spawning to substrate
Before proceeding, clean your hands and forearms, and put on your gloves. Take a good handful of coir from within the XL MonoBox™ and set it aside for later use.
We recommend pouring the rest of the coir into a large bowl to make it easier to mix with your spawn. Open your SpawnTub and tip the colonised grain out into the coir. The grain will be in solid blocks that you need to break up – it can take quite a bit of force to get started, but be careful not to squish any grains.
Swiftly and efficiently break up the spawn into individual kernels of grain, as each one is an inoculation point. The better you spread them through the coir substrate, the faster your colonisation will be! Transfer the mix back into your XL MonoBox™.
Finish with a thin layer of coir on top that you set aside earlier, until you can’t see any exposed grain. This is called a casing layer.
Secure the lid on the XL MonoBox™ and store it somewhere warm. An ideal colonisation temperature for many popular species of mushroom mycelium is between 24-26°C, but you can always try to mimick the colonisation temperatures from their natural habitat. Getting the temperature as ideal as possible at this point is crucial for success. You need the colonisation of the substrate to be quick, or there’s a high risk of contamination taking hold. This is the make or break stage of your grow.
In the right conditions, it should take around 10 days to see full colonisation of the substrate. However, we highly recommend leaving it for another 3 days after full colonisation to ensure the centre of the substrate, where you can’t see, is also colonised. Only when you’re confident that the substrate is fully colonised with strong, healthy mushroom mycelium are you ready to begin fruiting. Do not open your MonoBox™ before then!
Step 5: The best bit… Fruiting your mushrooms!
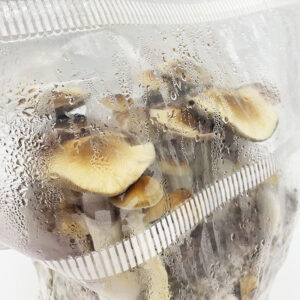
Maintaining a slightly cooler temperature of 20-22°C during the fruiting stage is essential for best results with many popular species of mushrooms. Remove the colonised block, known as a ‘cake,’ from the XL MonoBox™ and place it inside your grow tent as shown. Fold over the top of the tent so that humidity can build up inside.
Humidity and FAE (fresh air exchange) are extremely important for pinning and healthy mushroom development, as is temperature and light. They all need to work in harmony. Humidity will naturally build up inside the grow tent from water you previously added to the substrate mix, which is still stored in the cake. Unlike some other grow kits, you should not mist this kit (unless it looks dry).
The only time you’ll open your tent is when you’re ready to harvest your mushrooms. Even peeking for a few seconds is enough to lose humidity and cause growth defects such as aborted pins and caps breaking. We suggest cutting a 1cm slit through both sides of the tent near the top and placing an electric fan somewhere in the room on a low setting. This will create a gentle air current inside the room, which will help increase the FAE inside the grow tent.
Your mushrooms will need light to grow. We recommend indirect sunlight or a 6-7000K LED or fluorescent light a few feet away – if the light is heating the substrate, move it further away. If you notice the inside of your grow tent looking dry, it may be due to the fan being too close, the holes you cut being too big, or grow lights (if using them) being too close and hot. Observe what’s happening and adjust your setup as required. Fantastic results depend on it.
After around 3-7 days, you’ll hopefully begin to see lots of tiny white dots. These are hyphal knots that will develop into primordia, aka mushroom pins. It will take 4-5 days for them to grow into fully mature mushrooms ready for harvest. During this time, they’ll let you know if something isn’t quite right. Fuzzy mycelium at the base of the mushrooms and/or thin stems are an indication that more FAE is needed. Increasing the fan speed or length of the cuts on the bag might be something to try.
Don’t worry about any mushrooms growing around the sides and bottom of the cake. You’ll still be able to harvest them. If you want to give your mushrooms more room to grow next time, use a fruiting chamber instead of a grow tent. Check out the photos on our CyLab product page for results when growing inside our CyLab fruiting chamber.
When the veil beneath one of your mushroom caps is about to tear off, this is when you should harvest your first flush. If you don’t get there quickly enough, spores will begin to drop from your mushroom caps and make a mess! It’s best to cut the mushrooms off with a clean scalpel or knife. You can also just pull them off, but be careful not to damage the substrate too much.
After you’ve harvested all the mushrooms from your first flush, you can use a method called “dunking” to get more moisture into your substrate. Simply fill a container with water deep enough to submerge your cake and place it in the water. It will float to the top, so you need to use something to weigh it down. You need it to be fully submerged in water at all times.
Place a lid on the container or cover it to keep everything clean. Leave your cake submerged for anything between 6-24 hours, depending on how much patience you have. But obviously, the longer you leave it, the better your results will be. When you remove the cake from the water, give it a rinse under the tap and allow excess water to drain away before placing back into your grow tent.
You should continue to dunk your substrate after each flush. If you’ve taken good care of it, you should achieve multiple flushes of mushrooms from your grow kit before the nutrients are all used up.